When scanning your old family photos to archive those moments, you may face the problem of a honeycomb texture spoiling your scan. This is due to the “silk finish” paper texture, which was used a lot back in the day.
Read on and I will show you how to remove paper texture when restoring an old photo.

Jonathan sent over a WW1 Royal Engineers photo of his Grandfather. The faded old photo was damaged by crease lines. It required restoring but my main goal was to remove the paper texture. Methods such as despeckle and gaussian blur will simply smooth the image, leading to loss of detail. Here is how I achieved a sharp result while retaining detail:
When scanning, the light will shine off the edges of the tiny hexagon mesh. Scan the photo a second time, but this time rotating the photo 180°. (You can do 4 scans rotating at 90°, however on this occasion I just did 2 scans.) Open the multiple scans into the same Photoshop document, rotating them all to their original orientation and use the ‘Auto-Align Layers’ tool. With the original scan as your base layer set the layer/s above to ‘Darken’ blending mode. This will allow the layer/s to blend together masking out those light shines. This gives a good result but the texture is still visible.
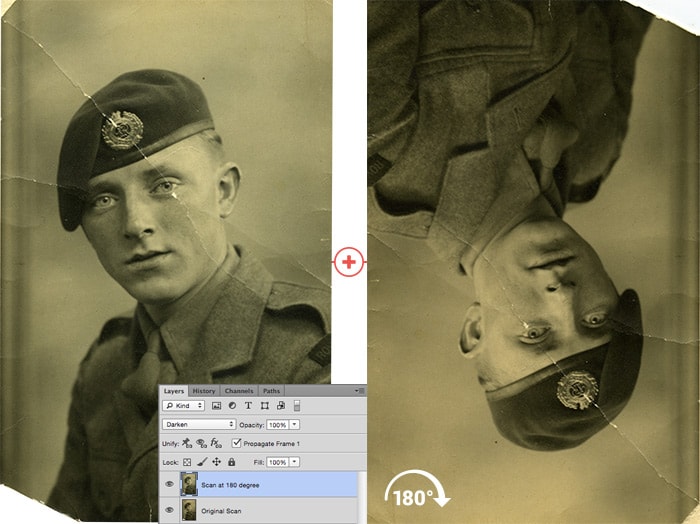
Two photo scans. With the 2nd rotated 180°. Align the layers and set the blend mode to ‘Darken’
To improve the photo further the next step is to use a FFT filter (Fast Fourier Transform). First of all merge your multiple scan layers then apply the FFT filter. You will see a mid grey canvas sectioned into four with lots of white starbursts, these are the repeating frequencies causing the repeating pattern. Using a black brush (set to the size of the bright spot) paint out each bright spot. It is very important that you leave the middle spot and horizontal and vertical lines. Use Inverse FFT to apply the filter.
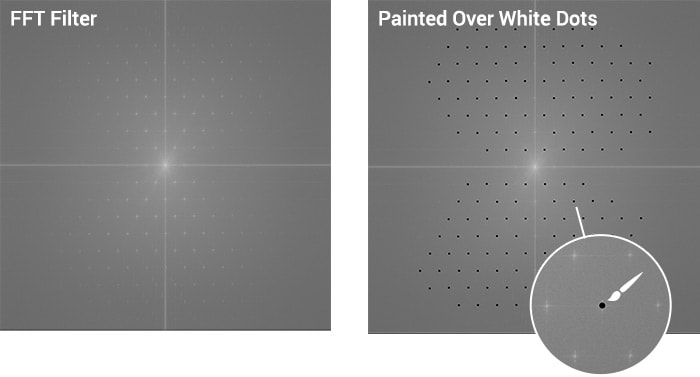
Use an FFT filter, then select the white star bursts with a black brush
After applying the FFT filter I went on to restore the photo, fixing the crease damage. In the image below you can see the different steps to removing paper texture.
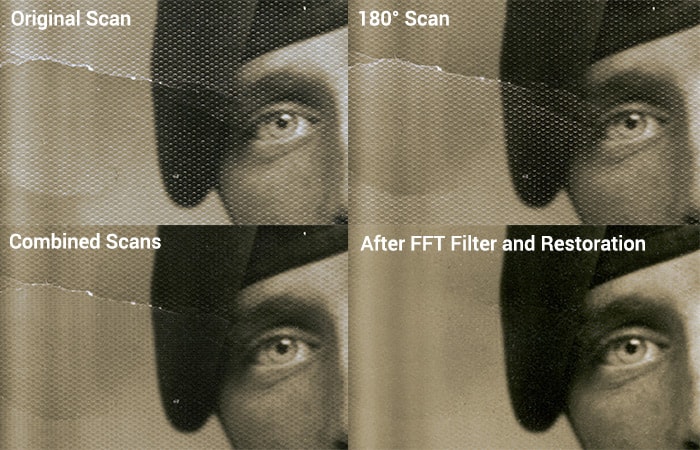
Side by side comparison showing the steps to removing paper texture
The final restored photo can be seen below:
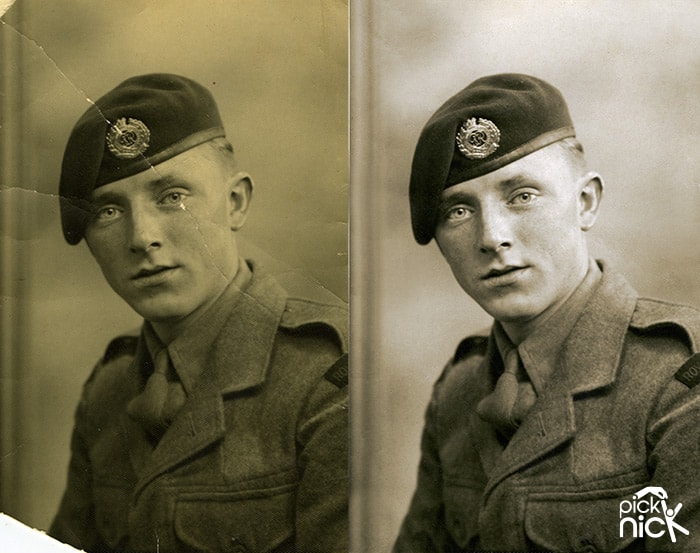
Final restored photo – showing before and after
“A gem in Medway!! This is my first time using Nick and definitely won’t be the last. The care, consideration and understanding of clients needs is second to none. The turnaround is very quick and the quality of the photo restoration was very high at a very reasonable cost. Truly brilliant.”
If you would like help removing paper texture from your old photos, then get in touch via my photo restoration website. I also offer glass plate negative scanning.
© Photo Restoration Services | Kent, UK