
Recently, I came across this great free online photo editor called Pixlr. (It even has a very fitting tagline with this blog! – Make every moment beautiful!) Pixlr has a similar interface to Photoshop, equipped with the tools perfect for some simple DIY free photo restoration. Read on and i’ll explain some of the tools to show you how to restore a photo for FREE.
If you need help restoring your photo or have a severely damaged photo, please take a look at my photo restoration service
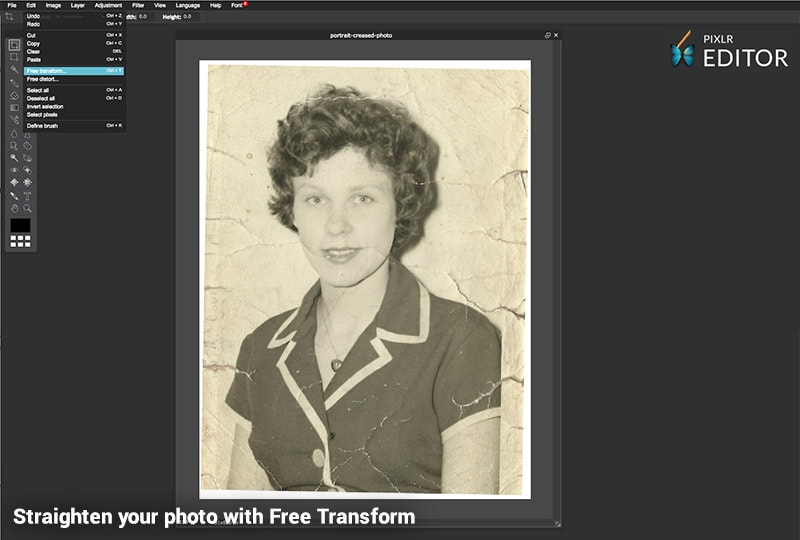
Straighten your photo with Free Transform
Go to Pixlr and open up your scanned photo. To straighten your scan (Well done you can skip this step if you lined up your photo perfectly on the scan bed!) go to ‘Edit > Free Transform’ the photo will now be selected with 8 anchor points. By hovering over a corner anchor the rotate icon will appear. Click and drag to rotate your photo and press ‘Enter’ to apply. Unfortunately at the time of writing there is no ruler guide tool.
Next select the Crop tool from the side tool bar. Starting from a corner click and drag to draw a selection box around the photo, you can refine the selection by moving the corner anchors. Press ‘Enter’ or double click to apply.
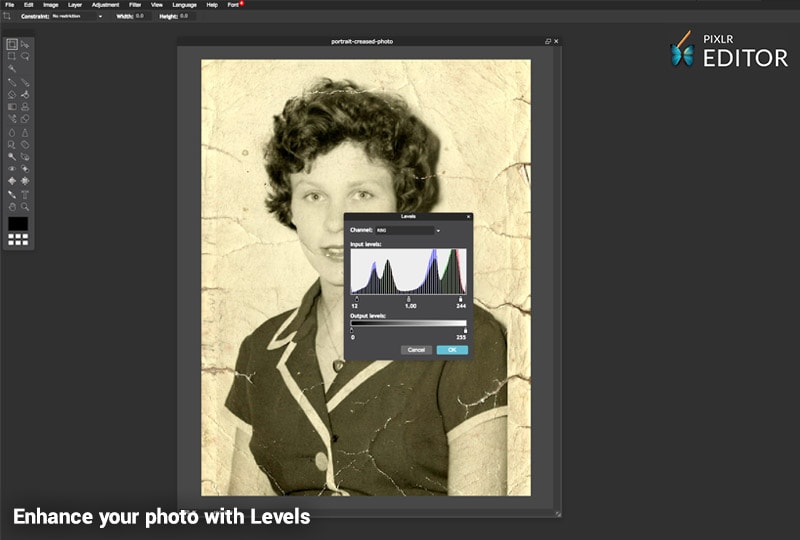
Enhance your photo with Levels
Auto levels is a good starting point when enhancing a faded photo. Go to ‘Adjustment > Auto Levels’. For further refinement, go to ‘Adjustment > Levels’ Under the histogram you’ll see 3 anchor points (Shadows, Mid Tones and Highlights). Generally to boost the contrast move the left and right anchors inwards.
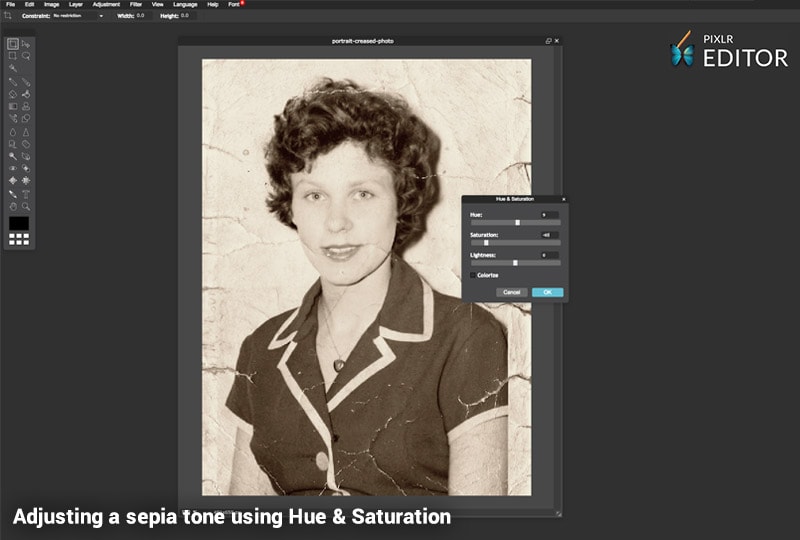
Add a sepia tone using Hue and Saturation
To adjust the sepia tones or to make a photo black & white go to ‘Adjustment > Hue / Saturation’. Adjusting the hue will change the colour tone and adjusting saturation will make the colour tone stronger or weaker.
To convert a black & white photo into sepia, go to ‘Adjustment > Sepia’. I found this too strong so to improve this go to ‘Adjustment > Hue / Saturation’ and reduce the saturation – With this photo, I took it down to -65 and hue up to 9.
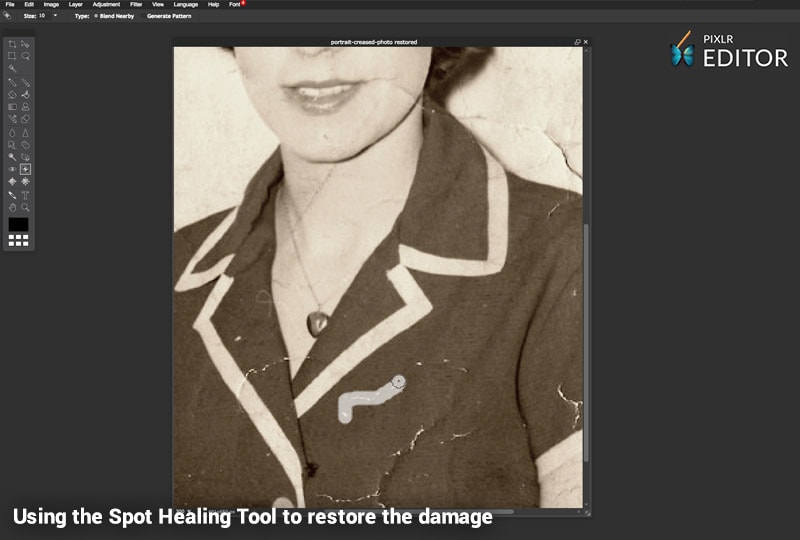
Restore your photo with Spot Healing
The clone stamp tool and spot heal tool are great Pixlr tools for fixing fold and crease damage. Spot healing is good for speed, where as clone stamp is best for precision. For accuracy its best to zoom in and use the spacebar to pan around your photo.
With the spot healing tool selected, set the brush size so it’s slightly bigger than the crease line you want to repair. Click and drag to brush over each crease line. Only covering a small area at one time gives the best results. I found that the Pixlr spot healing tool didn’t work very well when crossing over different tonal edges, this is where the clone stamp tool can be used.
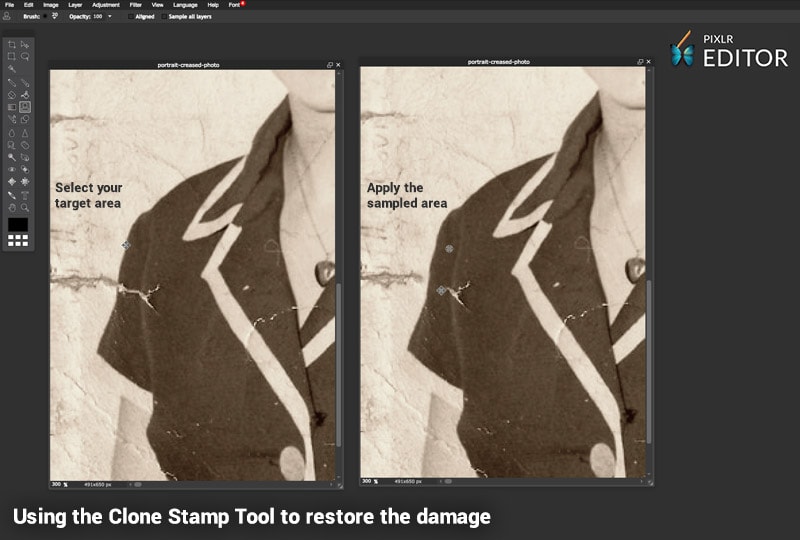
Restore your photo with Clone Stamp
The clone stamp tool works by sampling a target area and applying it the place of your choosing. With the clone stamp tool selected, hold down Alt (Command on Mac) the cursor will change to a target icon, now click on the area you would like to sample and let go of Alt. Now brush in where you want to apply that sampled area. You can use , and . key to change the size of your brush. You get much more control with the clone stamp tool and its perfect for restoring the areas that the spot healing tool couldn’t.
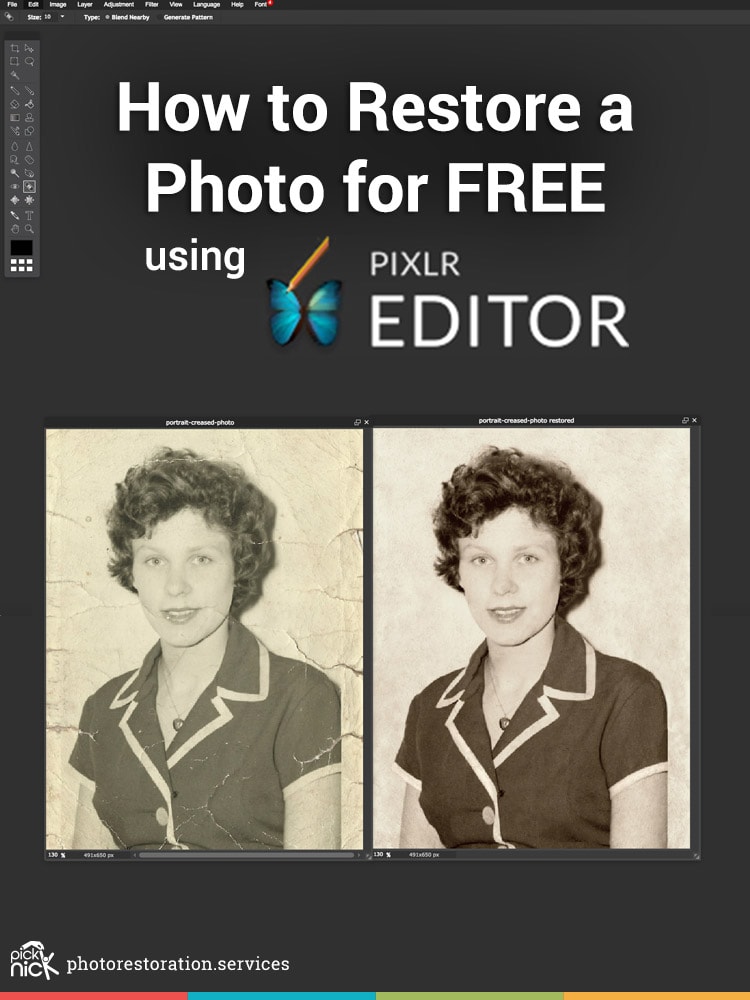
Preserving and archiving those moments is vital in giving your future generations a visual insight into their family history. I hope this Pixlr guide will help you restore your old photos so you can share those moments for years to come.
If you need help restoring your photo or have a severely damaged photo, please take a look at my photo restoration service.
© Photo Restoration Services | Kent, UK