Sun fading is a common issue when displaying our favourite photos that are exposed to sunlight, over time it will damage the photo. Here is a 4 step guide: How to restore a sun faded photo.

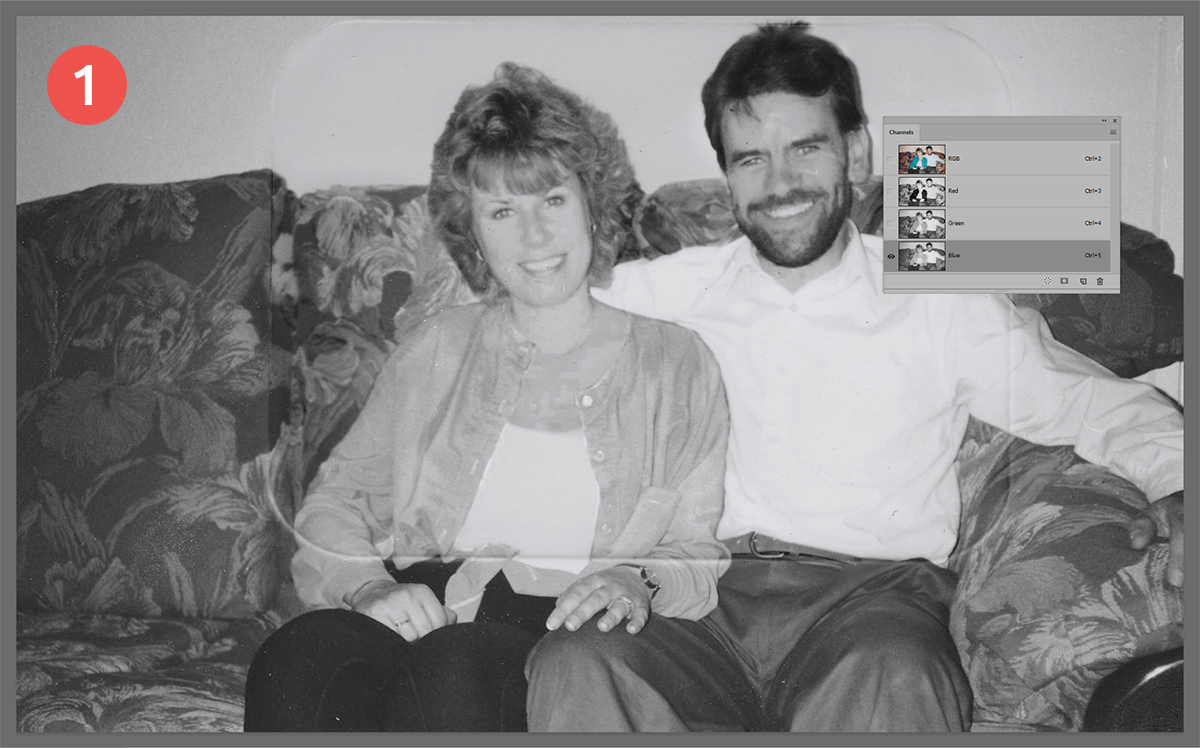
The first step is to equalise the tonal range. Start by adding a black and white adjustment layer and then isolating the faded area with a selection. By viewing the Channels in Photoshop you see the colour separations and where the problem areas lie. Working with one Channel at a time, adjust the levels to equalise the tones to match those outside of the faded area. Now turn off the black and white adjustment layer.


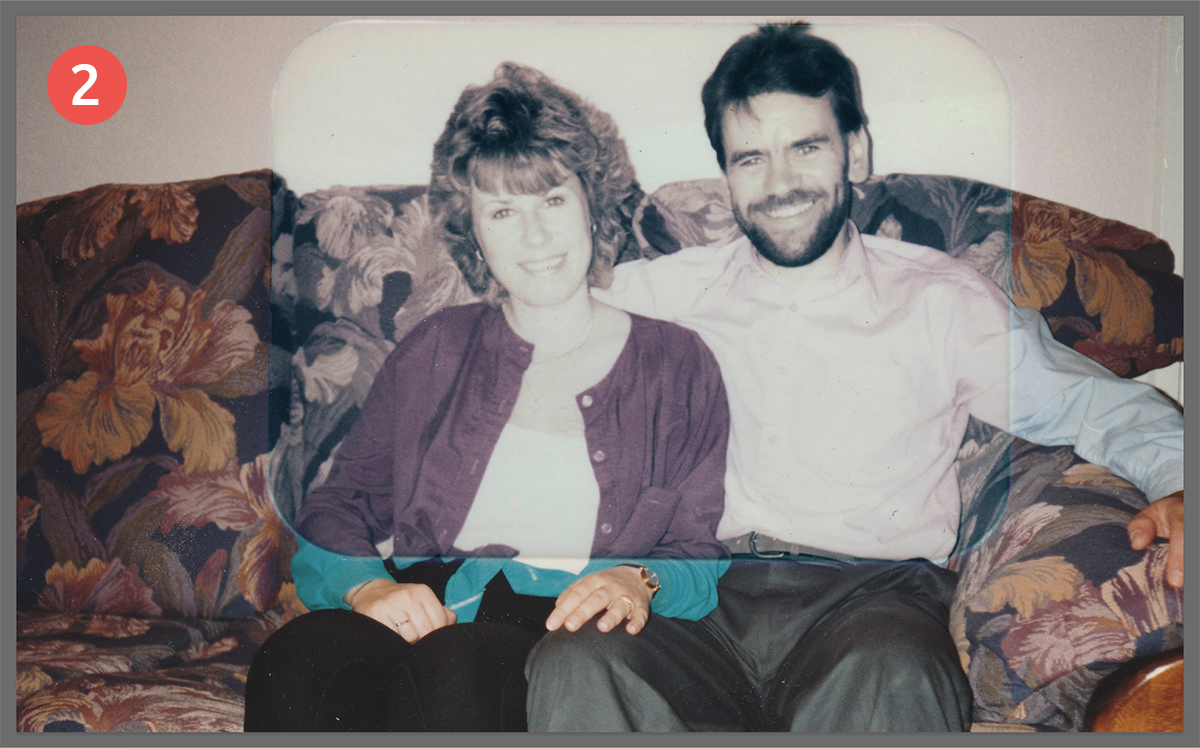
Next is to reapply colour tones to make the photo look natural once again. This can be done by adding colour tones to a combination of layers set to ‘Colour’ and ‘Soft Light’. A good tip is to sample the colours outside of the faded area, the aim here is to match the colours as close as you can.

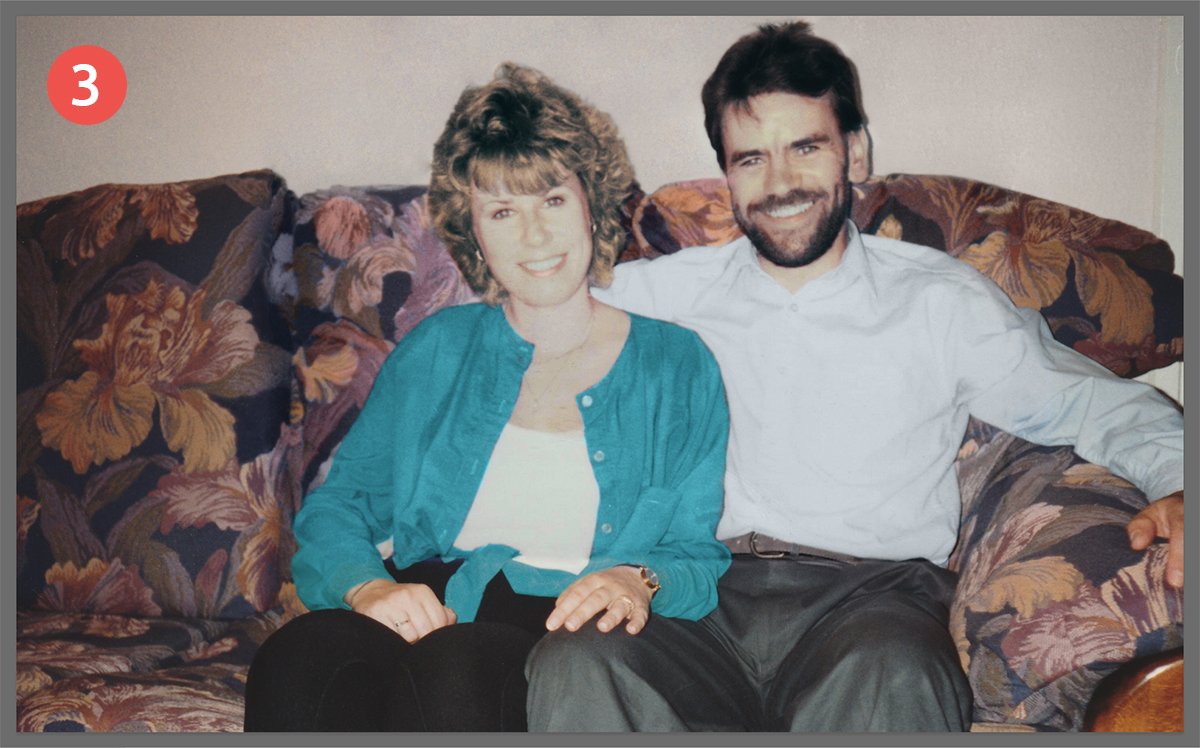
With the tonal and colour fading fixed, the last step is to remove the halo effect around the window area. Make a copy of your layer group and merge the copy into a single layer. Using the Clone Stamp and Healing tools blend out the halo line.


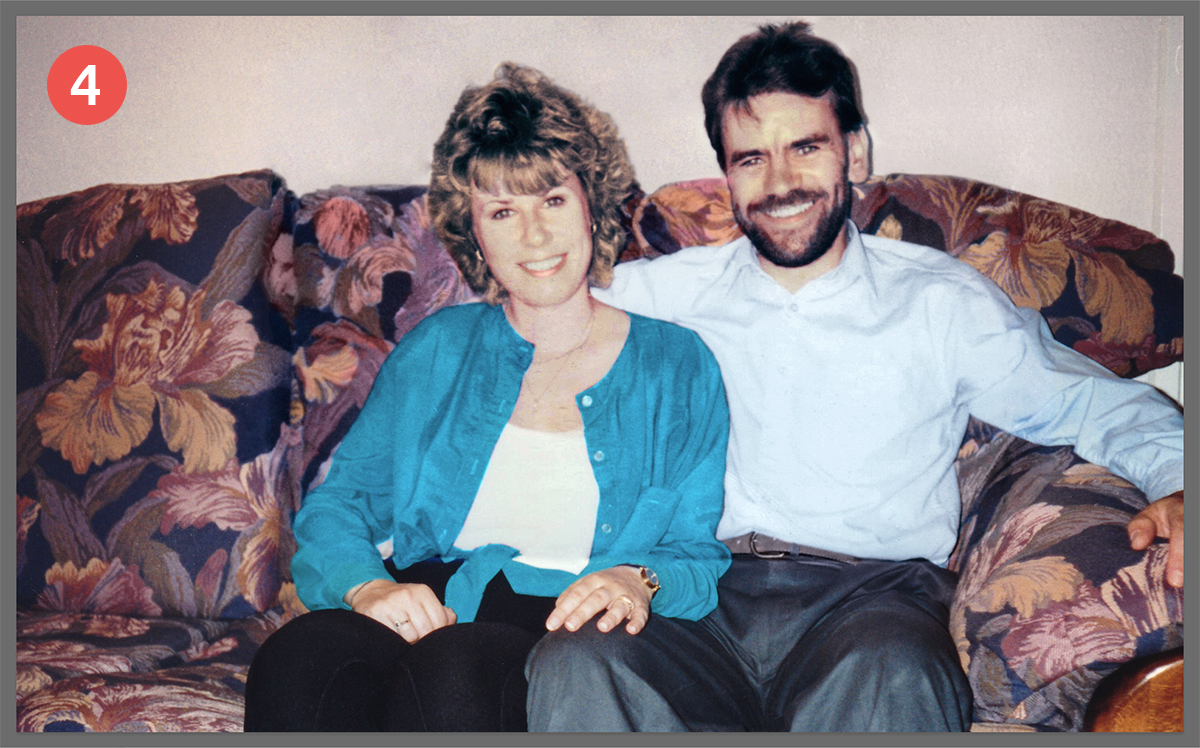
For some finishing touches, you may need to sharpen the overall image and do some Level and Colour Balance adjustments.
And that’s how to restore a sun faded photo!
Here are some more examples of restored sun faded photos.

If you’d like some help, get in touch to have your photo restored.
© Photo Restoration Services | Kent, UK