One of the most important factors for achieving a good photo restoration result is starting with a high quality scan, as the quality of the final result is directly related to the quality of the supplied scan.
One of the most common issues when I receive an enquiry is supplying a low quality scan, so here is a guide ‘How to Scan a Photo for Restoration’ .
Firstly make sure the scanner surface is dust free, clean the surface with a lint free cloth. Carefully position your photo face down on the scanner glass and be sure it is as straight as possible. Often you photo is not completely flat so once placed on scan bed place a heavy book on top of your photo to ensure the photo is pressed flat.
All scanner menus will vary, but they should all be capable of adjusting the following settings:
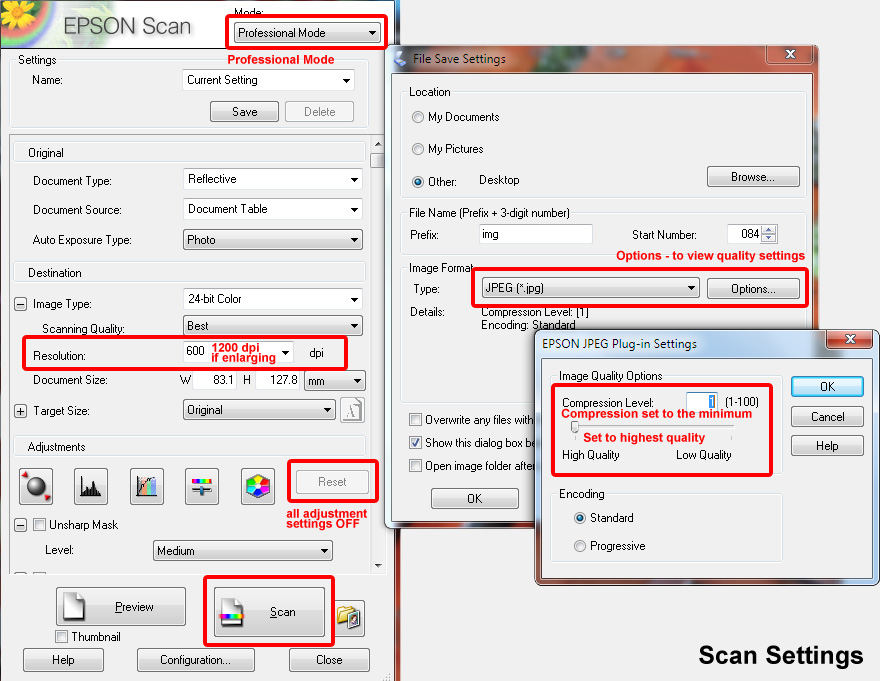
When saving your scan, select JPG, but we need to make sure any compression is set to its minimum. You should have a JPG ‘options’ or the option to select ‘Highest Quality’ in the JPG options you should have a compression scale, this needs to be set to highest quality / minimum compression. It might be displayed as a 1-100 scale.
If you are in doubt over the JPG compression save as a TIF file. However this will produce large file sizes.
When attaching the scan to your email ensure the email client is not compressing the attachment. If it is, or the file is too big for email use a file sending service such as WeTransfer.com
© Photo Restoration Services | Kent, UK